How to winterize an outboard motor yourself?
The season is over, the boat is shut down and the outboard has nothing to do in the coming months. In order for the engine to survive hibernation undamaged, it should be professionally winterized. Here we show you the steps required to winterize an outboard motor.
When the engine is outside for a whole season, it leaves marks on it. Be it dust, bird droppings or algae (if possible, the engine should of course be folded when not in use). Most dirt should be removed with a damp sponge and a little dishwashing liquid. This also gives you an opportunity to check the engine for scratches or rust spots that may need to be repaired.
2. Flush the engine
In any case, if the engine is not used for a long time, it must be flushed with clean water. Otherwise, the cooling channels tend to corrode and clog, and the impeller will last longer. This is especially true in salt water areas, where you should ideally flush the engine after every trip. Algae or other dirt particles can also accumulate in the fresh water cooling system.
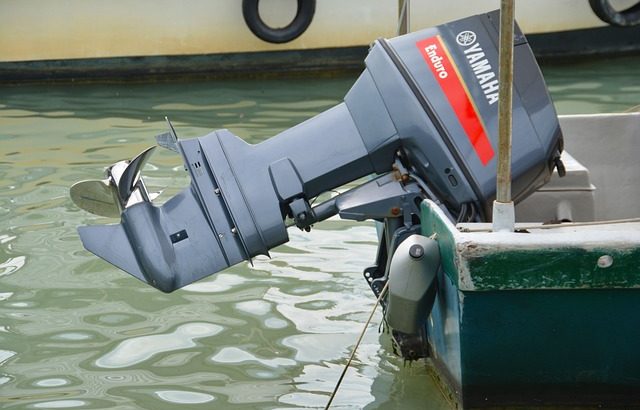
The motor is suspended using, for example, a repurposed handcart or other creative mount. For flushing, you can use a direct cooling water connection from the manufacturer, flushing “ears”, or a large container (barrel). It is important that the cooling inlets are well below the rim of the container. The container is filled with water and the hose is attached so that a sufficient amount of water can always flow.
When cooling is ensured, start the engine and let it warm up (at idle!) for a few minutes. If you want to be sure, you can add a gasoline additive to the used fuel in advance, or use a particularly high-quality and storable alkylate gasoline.
3. Drain and preserve the carburetor
This should only be done if recommended by the manufacturer. Some experts recommend stopping the engine normally with the switch instead. Especially with two-stroke engines, however, there is a risk that the gasoline in the carburetor will “clump” after a while.
If you decide to leave the engine without gasoline and preserve the engine from the inside, do it like this. With the engine running, pull off the fuel hose. Shortly before the engine shuts down, preservative oil is sprayed through the carburetor intake (the air filter may need to be removed first) and continues until the engine shuts down. This produces white exhaust smoke and may leak some oil from the exhaust. In addition, you can pull the choke just before it goes off to burn off the last bits of fuel in the carburetor.
4. Check the spark plugs
Pull out the spark plug connector and unscrew the plugs with a spark plug wrench. Heads should be free of soot and rust. If not, clean carefully with a wire brush and white spirit. Or better yet, replace the spark plug.
5. Preserve the combustion chamber
Now spray some preservative oil into the combustion chamber through the spark plug hole. Now you can slowly pull the starter cable a few times with the stop button depressed to distribute the oil evenly.
6. Engine oil change (4-stroke engines only)
After warming up, it is a good idea to change the engine oil. You should read the instructions for the correct procedure here. 10W-30 marine oil is suitable for most smaller engines, but follow the manufacturer’s recommendations when choosing an oil. Depending on the number of hours of operation, a new oil filter and timing belt (if available) should also be fitted.
Now the engine flush can be dismantled or the engine can be removed from the water container.
7. Change the transmission oil
Although this is theoretically sufficient on engines that are not used frequently every two years, it is advisable to change the transmission oil every year before frost. If water has penetrated, it can easily destroy the gearbox at sub-zero temperatures.
After placing the sump down, first loosen the lower oil screw and then the upper bleeder screw. If the oil is milky, water has penetrated. In this case, it is necessary to definitely investigate the cause. In any case, the seals on the screws must be checked.
New gear oil is forced into the lower tube screw until it flows upwards. Then screw it back up and down. Attention: Dispose of old oil in the correct way!
8. Check the impeller (impeller)
The impeller should be checked and ideally replaced at least every two years. It is usually located at the bottom of the shaft. The procedure should be described in the manual.
9. Check the propeller
Is the shear pin still good and is there a replacement pin available? Is the screw secure? The propeller should be removed and the shaft inspected for corrosion at least every two years. Visually inspect the propeller. Then lubricate the shaft with waterproof grease and reassemble the propeller.
10.Lubricate moving parts
Old grease residues can be removed with brake cleaner. Then all visible moving parts should be lubricated with waterproof grease. You need a lubricator for lubricators.
11. Check the zinc anode.
At the latest, when only 2/3 of the anodes remain, it should be replaced.
The entire engine block is (slightly) sprayed with water-repellent oil, e.g. WD-40.
Now the engine is ready for a break of several months. It should be stored in a dry and upright position. If it is wrapped in a sheet, it is important that air can circulate well and condensation does not form.
If you do not dare to winterize the engine yourself, contact an expert or a branded service, which you can find here, for example.
Info source: www.klabauterkiste.de
New and used boats for sale in europe – free boat advertising.
Visit our other websites:
www.boatsforsale.eu
www.boat24.com.au
www.boat24.co.nz
www.lode24.eu